As with my previous Houdini blog post, this mini-tutorial will serve as the start of a series about tricks that have empowered my workflow in Unreal.
Recently I've found myself working on large, repetitive tasks, that would benefit from being automated to some degree. These include
- continuously re-importing large tiled terrains, with updated color maps and normal maps.
- renaming/re-organising large numbers of files
- Changing settings of static meshes in bulk - for example, setting up LODs, or assigning materials
- Creating large numbers of material instances to apply to similar mesh or terrain pieces
For the last few releases, Unreal has had native Python support, and an older feature known as Blutilities, was re-branded to the much less punful Editor Scripting Utilities.
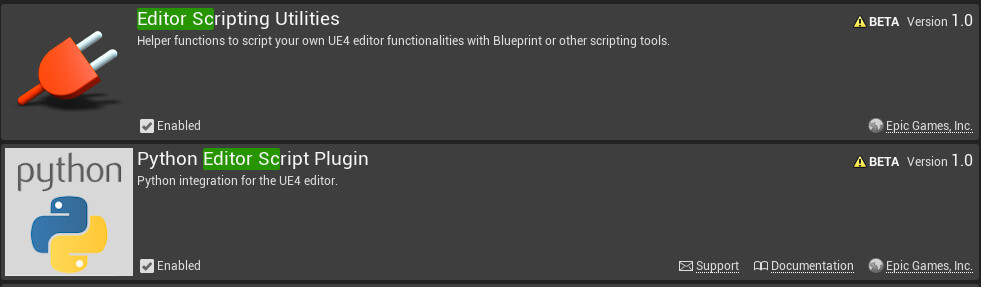
First, make sure that you've got both plugins enabled.
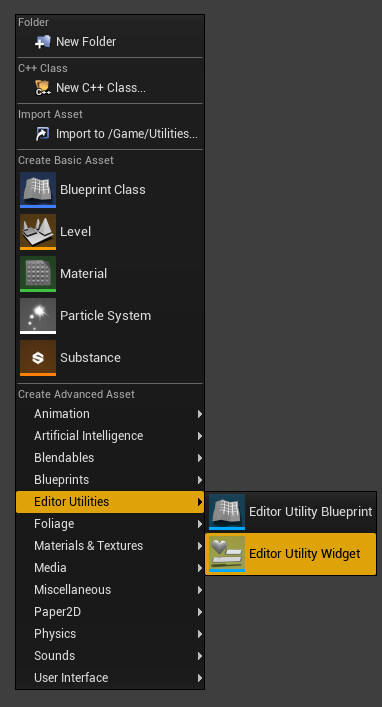
Then create a new Editor Utility Widget.
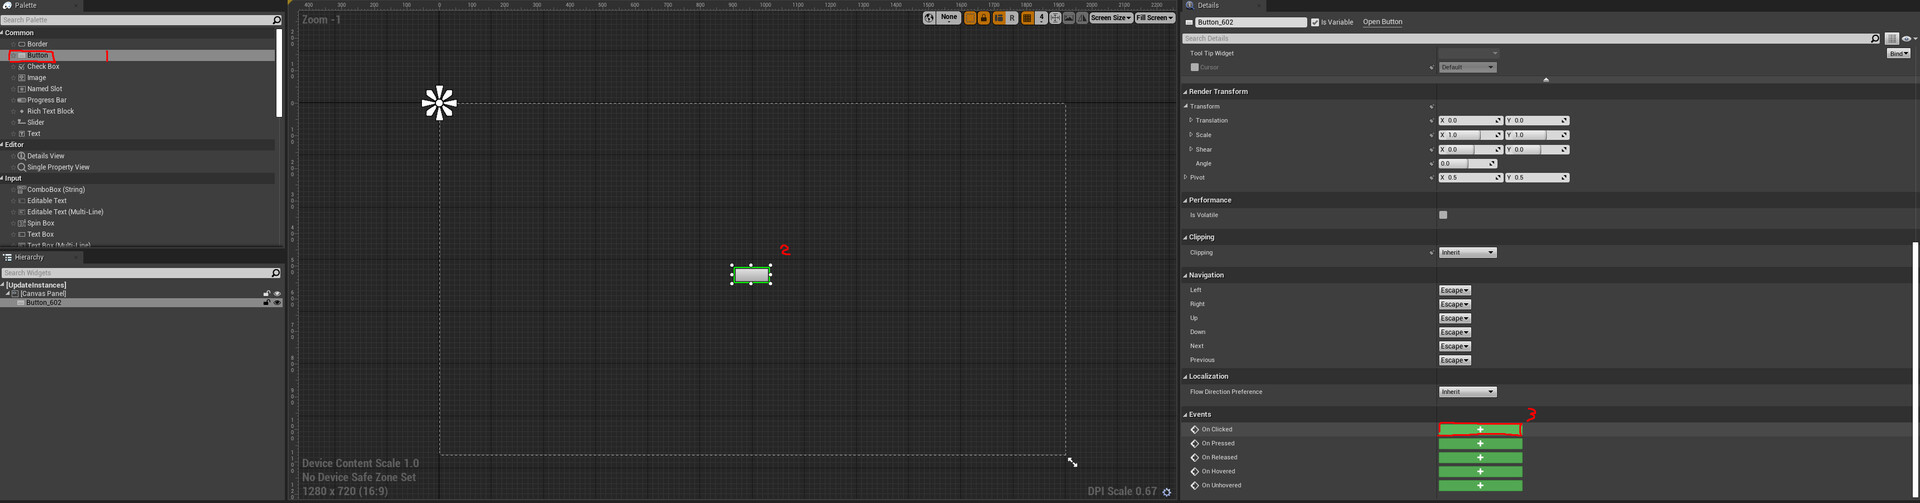
Internally, this widget looks no different to a regular widget. So create a button and bind to it an On Clicked event. I'm going to gloss over a lot of the menu creation, since there are already plenty of tutorials that cover this topic. But rest assured, when you run the widget, there will be a button which is clickable, and exectutes whatever functionality you have assigned to it in the Blueprint Graph.
I'm going to jump straight into the python segment of this tutorial. Search Python in Blueprints contextual search, and you'll find a few nodes, but the most important one, which we'll be focusing on, is Execute Python Command. (In actuality, it's more sensible sibling Advanced).
Don't let the Advanced moniker fool you, it's far simpler to debug code with the Command Result string.

This node allows you to execute a self-contained block of python, or to call a function that you've written externally. While the latter method is surely very powerful, my main interest at the moment is in being able to handle everything from within editor.
My goal is to automate the creation of Material Instances, and the following code does just that.
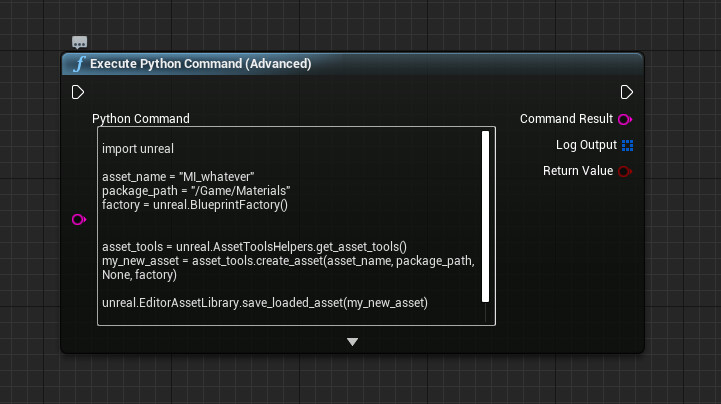
The function create_asset, is the most important piece of code here, and if you check out the API reference, you'll see that it takes 4 arguments.
name, path, class and factory.
Unreal accepts None as an argument for Class, and I assume that this is because it is able to infer the class from the factory used.
First I create the variables (asset_name, package_path, factory) which I'm going to use and assign each of them a value. Once the variables are assigned, I run unreal.AssetToolsHelpers.get_asset_tools().create_asset, but first condense the first part of the argument to just be referenced as asset_tools.
I store the the newly created asset as my_new_asset and finally save it with the command unreal.EditorAsetLibrary.save_loaded_asset(my_new_asset).
And Voila! If you wire the out pin of the On Clicked event to the execution pin of Execture Python Command. Load the widget, and click the button. You'll see that a material called MI_Whatever has been created in the folder Content/Materials/.
This is great, and while I can just use the write a little block of python wherever I want to use some of its functionality, it'd be useful to create some reusable scripts. For example, what If I wanted to create a Blueprint, or a level, instead of a static mesh. And what if I wanted to quickly create a bunch of different objects with unique names.
Enter my own custom built Python Create Asset node. This node is actually a macro, created from a combination of Blueprints and Python. It uses an enumerator so the user can select which type of asset is getting made, and instead of writing python, the user just enters the name of the asset and where to create it. So without further ado, lets hop inside.

Here is the inside of the macro, it's dead simple, and basically just appends a bunch of strings to cobble together the python script that executes. The Macro selects between some pre-written snippets of python, and automates the creation of arguments to pass to the create_asset function, which means that in the future, all I need to do to create an object is select the type, give it a name, and set the relative path in the project where I want the asset to be created.
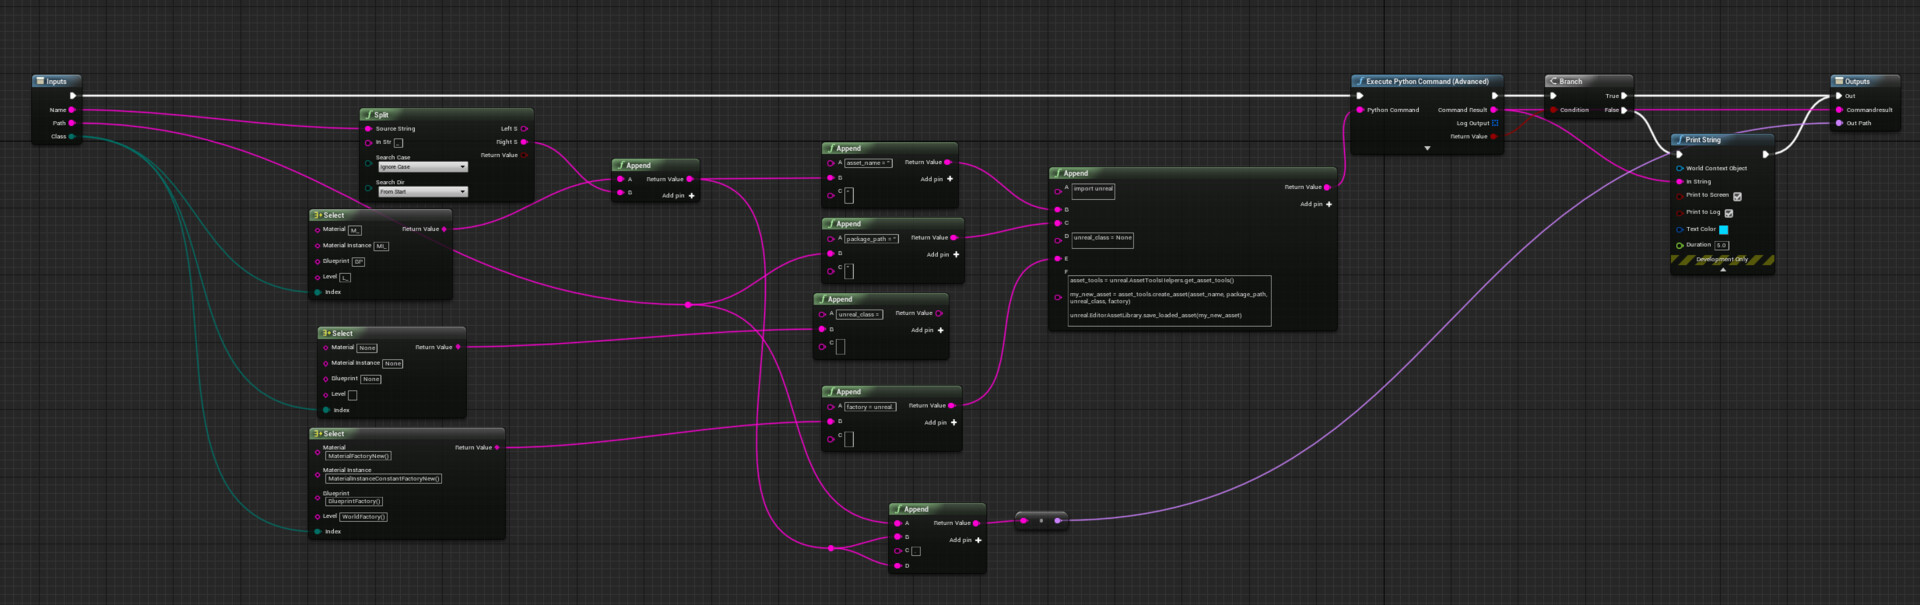
This is especially useful, because you can create all sorts of logic based off selected assets, actors, and write for-loops within blueprint. It is of course possible to build all of this functionality in Python. But for beginners, like myself, it's helpful to have the ability to save bits of python code that i know I'll be using a over and over again. Also, if you are working on a project with non-programmers, it's a handy way to expose a lot of extra functionality to designers and artists who are sick of repetitive tasks of importing lots of files.
I hope that somebody else finds this helpful, and if anybody has any corrections, or thoughts on a better workflow, I'm all ears. I'll be sure to continue making these little walkthroughs as i learn more.
Thanks for reading!