SideFX Project Pegasus #4 Progress Report

Work In Progress / 30 July 2023
  1. First Entry
  2. Foliage Foibles
  3.  Authoring Terrain Colour Maps in Houdini

    Rather than focusing on anything specific in this blog post, I thought I'd just do a general summary and recap of where we are at. 

    Alex Hamera masters student from Gloucester University recently joined the project and is doing some exciting and ground-breaking getting Houdini clouds into Unreals Sky system. While still very WIP, the possibilities here are extremely exciting.

Feike has reached a major milestone in the foliage tooling, with all necessary features implemented and robust enough to start making plants. Soon we'll be growing forests!

Ian has generated some AWESOME looking procedural cliffs to make the environment even more intensely detailed than it was previously
And Tilman has been putting his procedural wood generator to good use and crafted this awesome looking procedural cabin

For my part, I've been ironing out some kinks in the Landscape workflow and helping a little with the foliage tools.

And I've saved the best until last. We are currently all very busy preparing for Siggraph, which while an incredibly exciting prospect, is also a very nearby one. The talk, which is being led by Ian, will feature work by all of the artists on Project Pegasus, and give the audience a more in-depth view of all the tools, techniques, tips and tricks that we've been developing. While not all of the artists are able to make it on the day, we're all looking forwards to the event and can't wait to hear what people think :)


SideFX Project Pegasus #3 Authoring Terrain Colour Maps in Houdini

Work In Progress / 18 July 2023

Prior Blog Entries

  1. First Entry
  2. Foliage Foibles

It's been longer than I would have liked since my las blog post, so I've got some catching up to do. Due to Feike's incredible progress with the Pegasus foliage tooling, I've actually come full circle from working on terrain back to plants. The possibilities with the system we've been developing are truly exciting, and I can't wait to share more on that in the near future. 

Today I'm going to share a little bit on the terrain workflow that we're using on Pegasus. Or more specifically, how we're colouring our heightfields inside of Houdini.

If you've ever authored a terrain before, inside of Unreal Engine or elsewhere, you'll be aware of the fact that simply blending materials with different layer masks in-engine doesn't really cut it if you're aiming for the highest possible quality. You end up with a terrain that looks pretty detailed up close, but it looks bland and uniform, and really falls apart when viewed from a distance. As a result, artists end up tinting the layers in engine, using noise textures to add breakup, layering on top tiling macro textures, or any combination of the above. All of these techniques work well, and they do have the advantage of being in-engine, so you have full context while making adjustments and tints.

However, all this extra behaviour can bloat a material, increasing compilation times and hindering performance, and it's still difficult to achieve the complex and subtle results that our hearts desire compared to in an external image editing, or terrain authoring program. 

And this is where Global Textures come in!
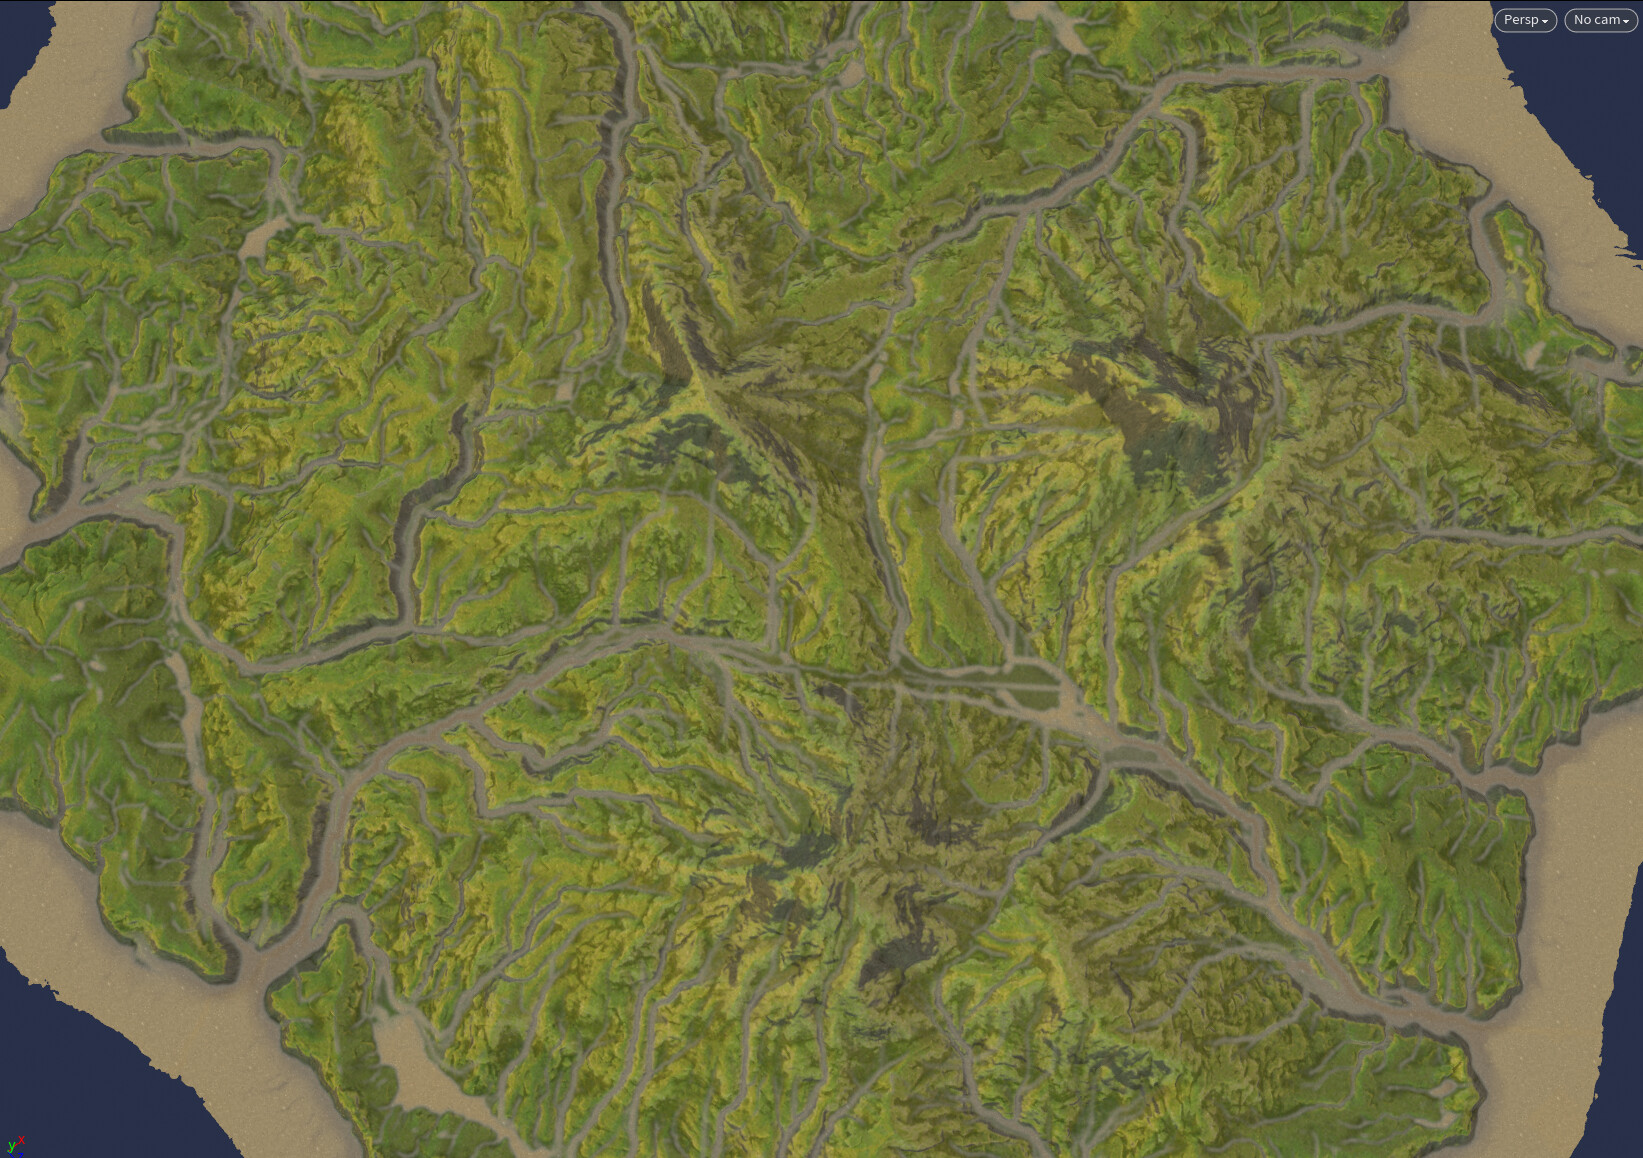
Global Terrain Albedo (Colour)

By laying a global colour map on top of our tiling materials, we now have a single texture that allows us to art-direct the entire terrain at once. The best part is that you can continue to use tints and layer noise to your hearts content, but in practice, a single well-authored global colour map can replace the need for a lot of these features. 

So then the question becomes, where and how should I produce the colour map? There are a tonne of options, ranging from classic image editing programs like photoshop, to terrain authoring tools, such as World Machine, World Creator and Gaea, and even to modern material creation suites like Substance Designer and Quixel Mixer. Every tool and approach has it's own workflow, and it's own strengths. But since this is a Houdini centric blog, you guessed right, we'll be exploring how we can author colour maps using Heightfields in Houdini.


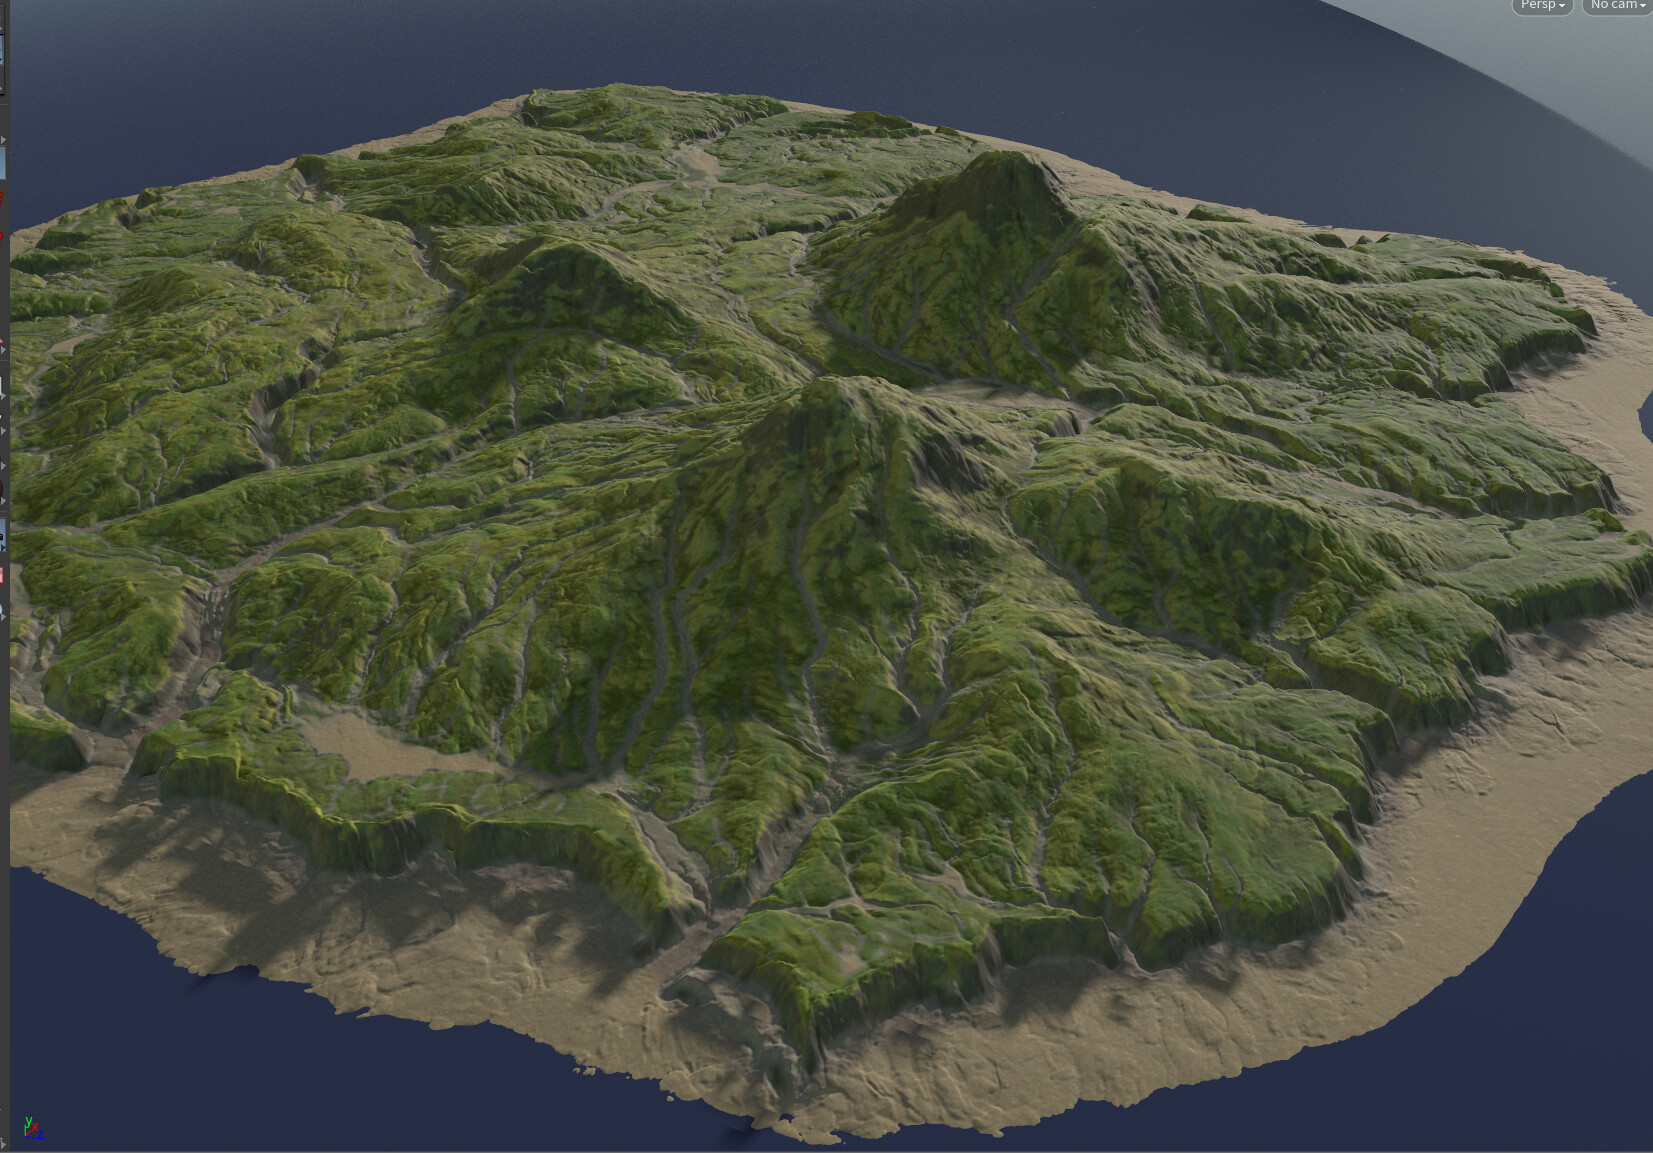
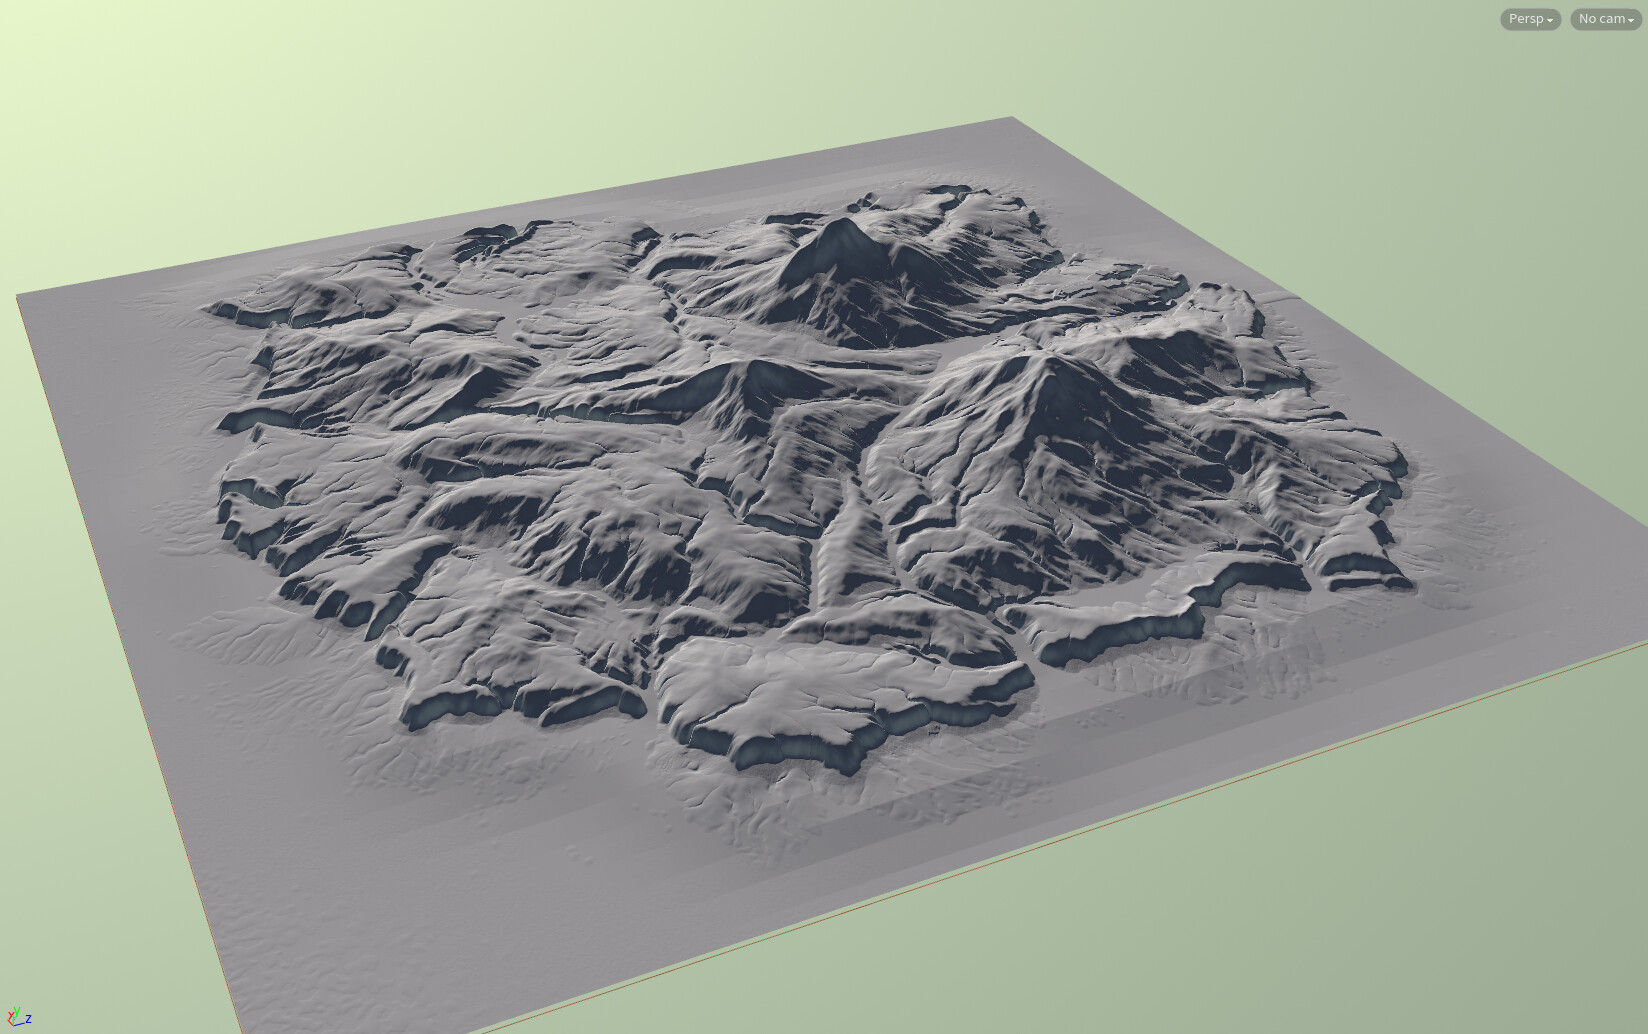
Here is our untextured terrain. Now, where to start?

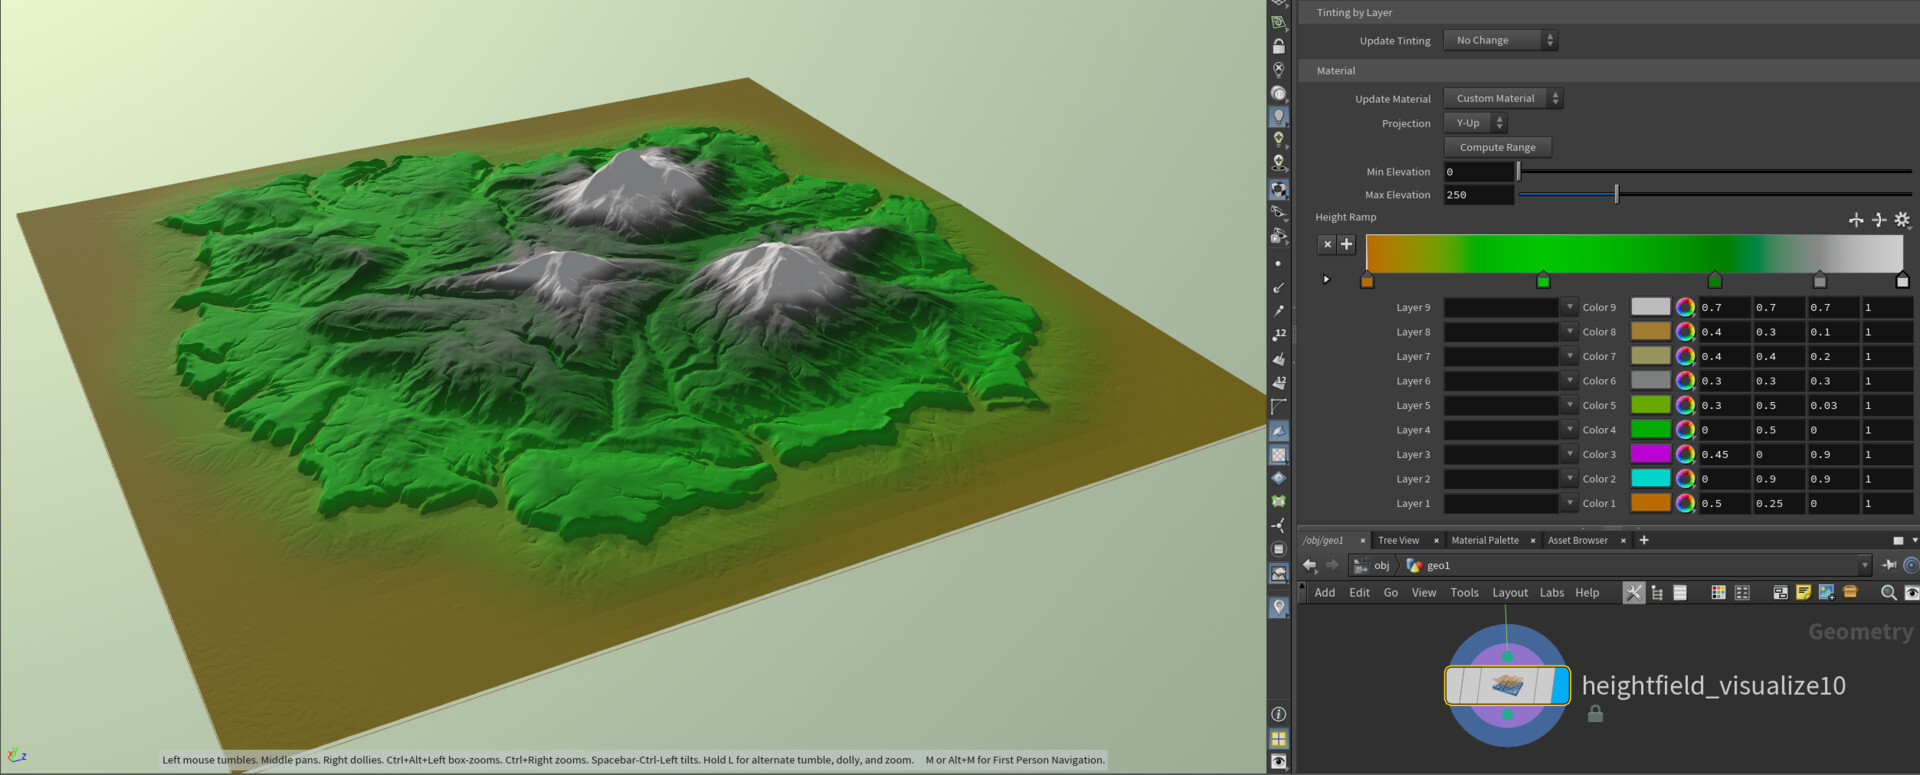
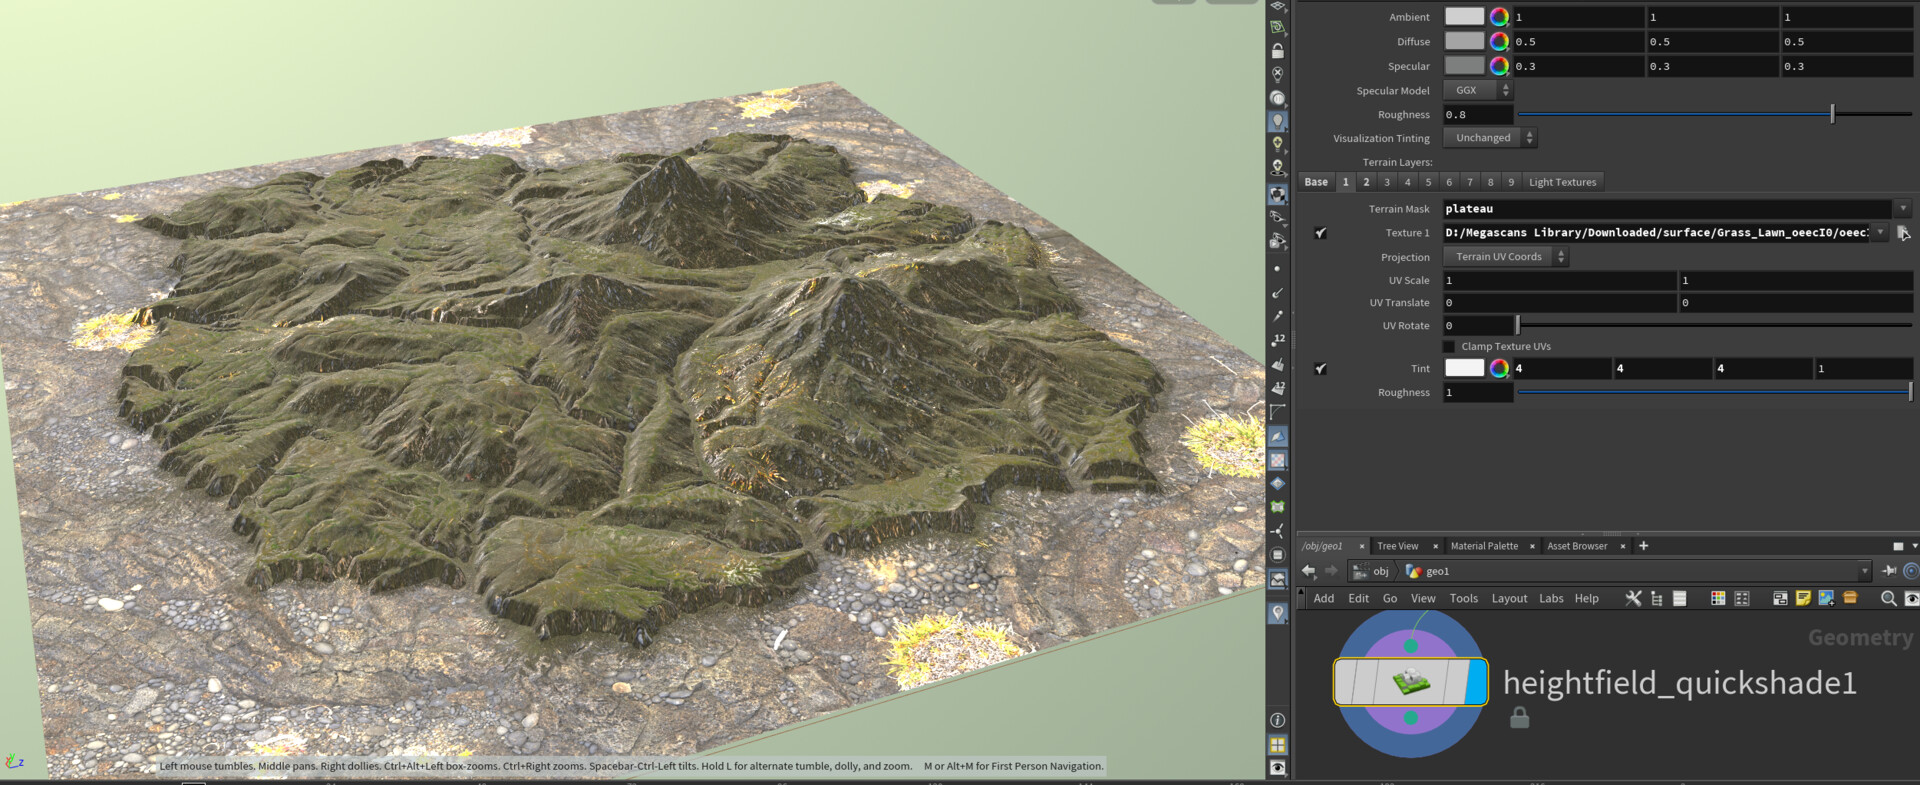
Houdini has a couple of stock options for previewing terrains with colour, Heightfield Visualise, and Heightfield Quickshade.

Heightfield Visualise allows you to apply a ramp to the terrain by height and to assign colours to specific layers.

It's cool for visualising multiple layers simultaneously in the viewport, but it's pretty limited, as you only have a set number of layers to work with, you're limited to straight opacity based blending, and the layer order is painful to customise after the initial setup.

Next up, we have Heightfield Quickshade. Quickshade is more advanced, in that it allows us to assign specific textures to our terrain according to masks, in addition to per layer tints. But besides this, it suffers from the same issues that afflict the visualise node.

Besides the aforementioned issues, there are two big problems with both of these approaches. 

1. There is no clear or easy way to export your results to as a texture to disk.

2. Despite Houdini being the most powerful node based content creation tool on the planet, terrain colouring is treated as a process that can take place in a single node. 

I'm sure there is a way to figure out your way around issue #1, but issue #2 is more inexcusable. Substance Designer is an entire program dedicated to authoring textures, with a rich variety of nodes that can be used in infinite combinations to produce beautiful colour textures. Isn't Houdini deserving of the same?

I hear some cries of "that's what COPS is for!"  (For the uninitiated, COPS is Houdini's compositing tool), and indeed they might be right. COPS, as least in theory, is not all that dissimilar to a tool like substance, and it is possible to set up a pipeline between SOPS and COPS in order to send Terrain data back and forth, and it is possible to author terrain colour maps this way. However, I probably already lost some the minute that I started using those acronyms and mentioned the word pipeline, and besides, COPS1 is getting a bit long in the tooth.

So, back to that recent discovery (thanks to the folks are Applied Intuition, who are hiring by the way)


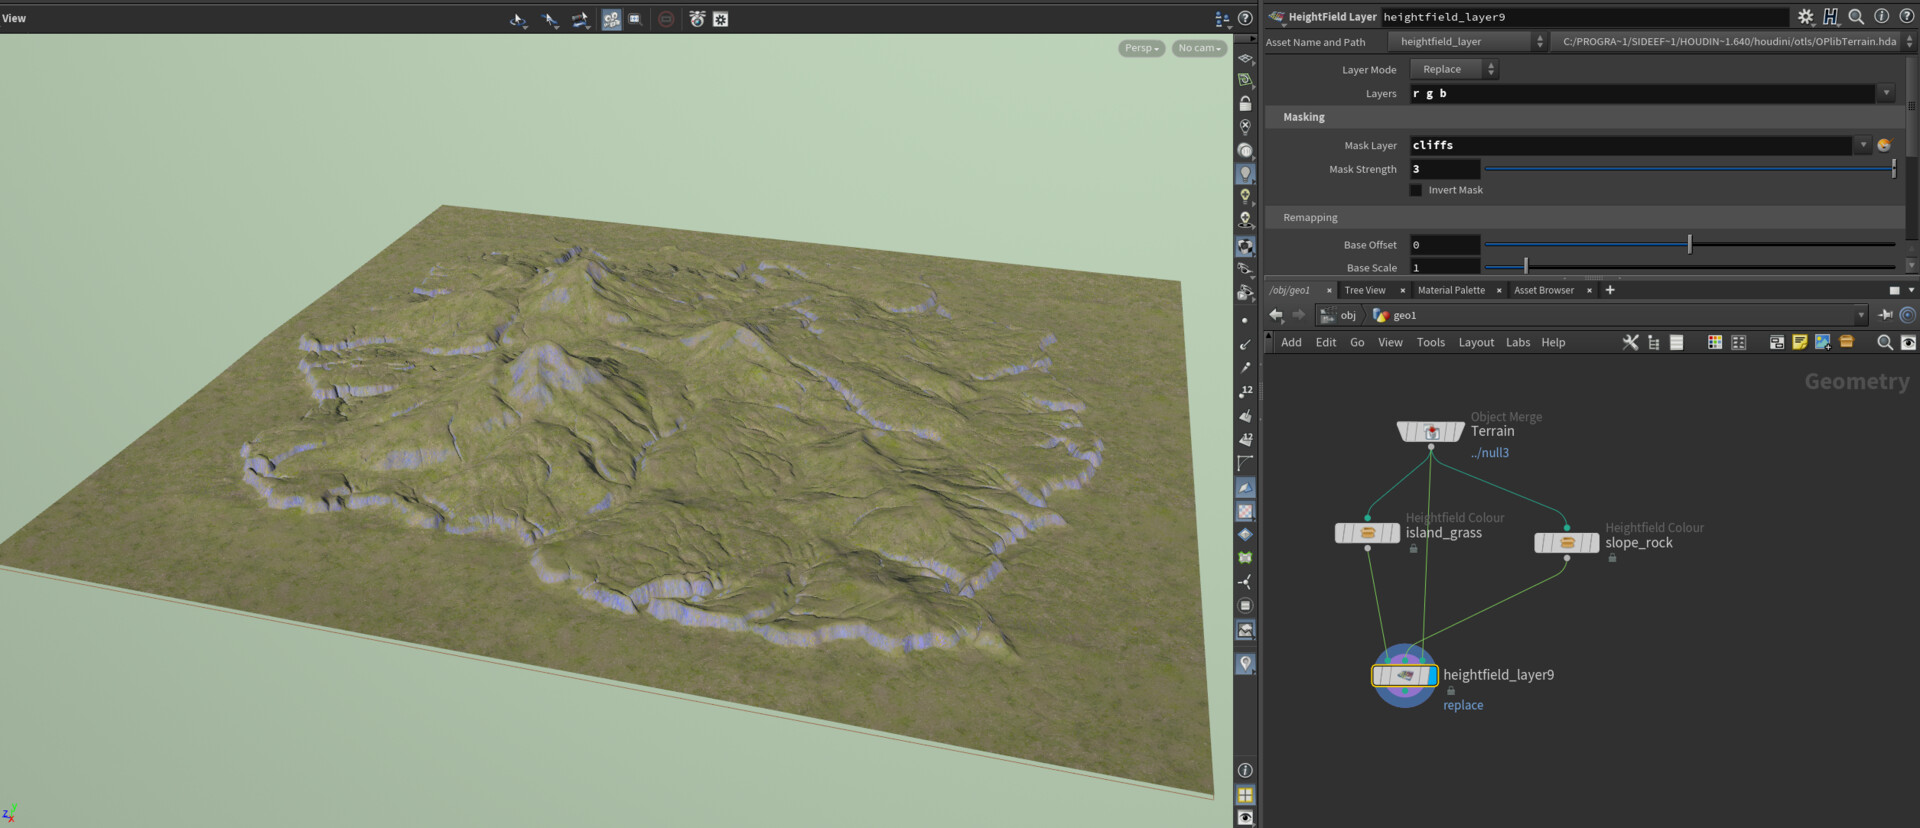
It turns out, that if you set up a heightfield visualise in a certain way, you can get it to treat three heightfield layers as R, G and B values. 

Thus, it follows, that you can write and modify any data in those three layers, and provided you are using these visualiser, you will see the results in the viewport. To test this, we can quickly import a texture using the heightfiled file node. This is a little bit fiddly, because it requires three file nodes setup, each reading a separate channel of the input texture, and writing to the correct layer. But it's only little bit fiddly, and besides, the next part is where this gets really cool.

One of the core features of Houdini, is the ability to create Houdini Digital Assets (HDAS). These can be thought of as bundles of logic, or programmes, which have been designed by the user. They are very easy to create, and in this case, it allows us to collapse this graph into one single node which only requires a single texture input

Now that colour is represented by actual heightfield layers, the full suite of heightfield operations is available to us, allowing us to manipulate colours to our hearts content. 

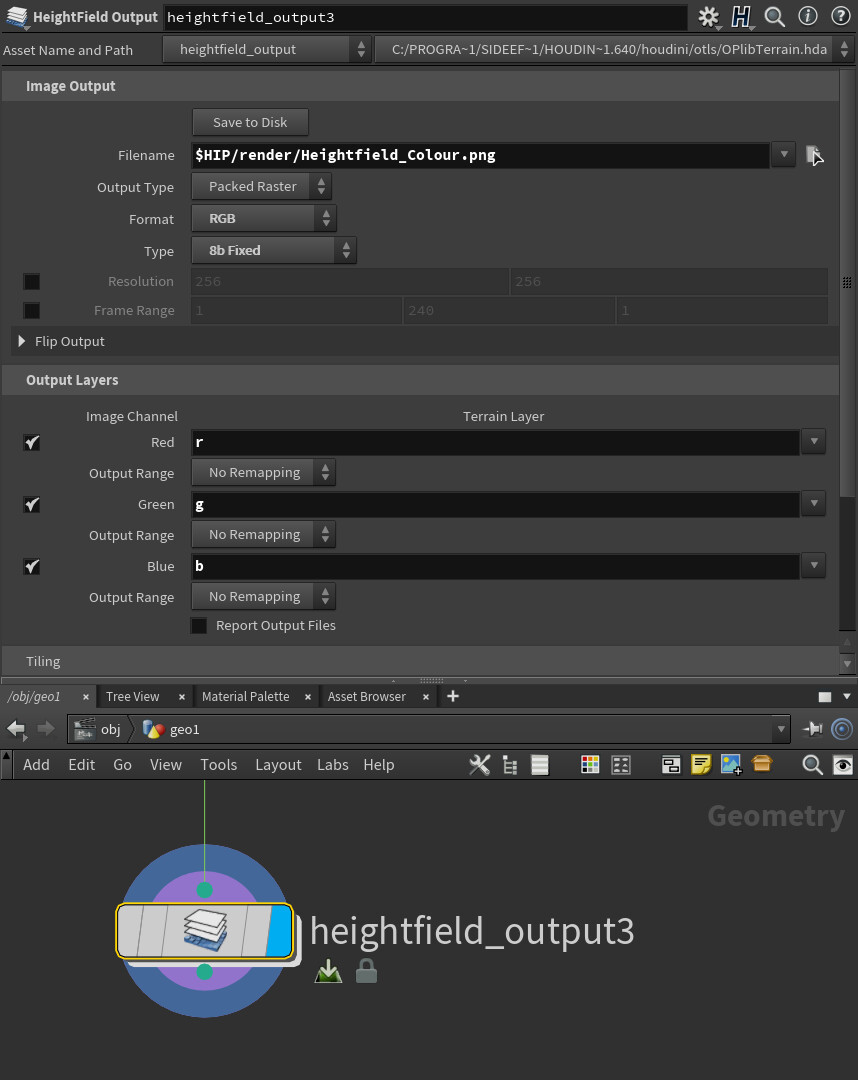
And best of all, the native Heightfield Output node can be used to export our final map to disk.

And that's really all there is to it!

I took the tools a little bit further for Pegasus, so instead of just applying colour in isolation, you can import height and roughness textures alongside to further modify the terrain, adding additional controls layering controls and distortion,  as well as a tint and blur node.


All of these tools and more will of course be released with Project Pegasus for free, with accompanying tutorials and documentation!

And behold, a simple and powerful terrain colour authoring workflow direct in Houdini! With this, I may never need to leave Houdini to work on terrains ever again, and I'm quite happy at last, to say, Houdini is the best terrain creation tool on the planet! (More on that later). Future investigations will be done into how robust Heightfields are as a general Substance Designer alternative for authoring materials, but my gut feeling is pretty darn good.

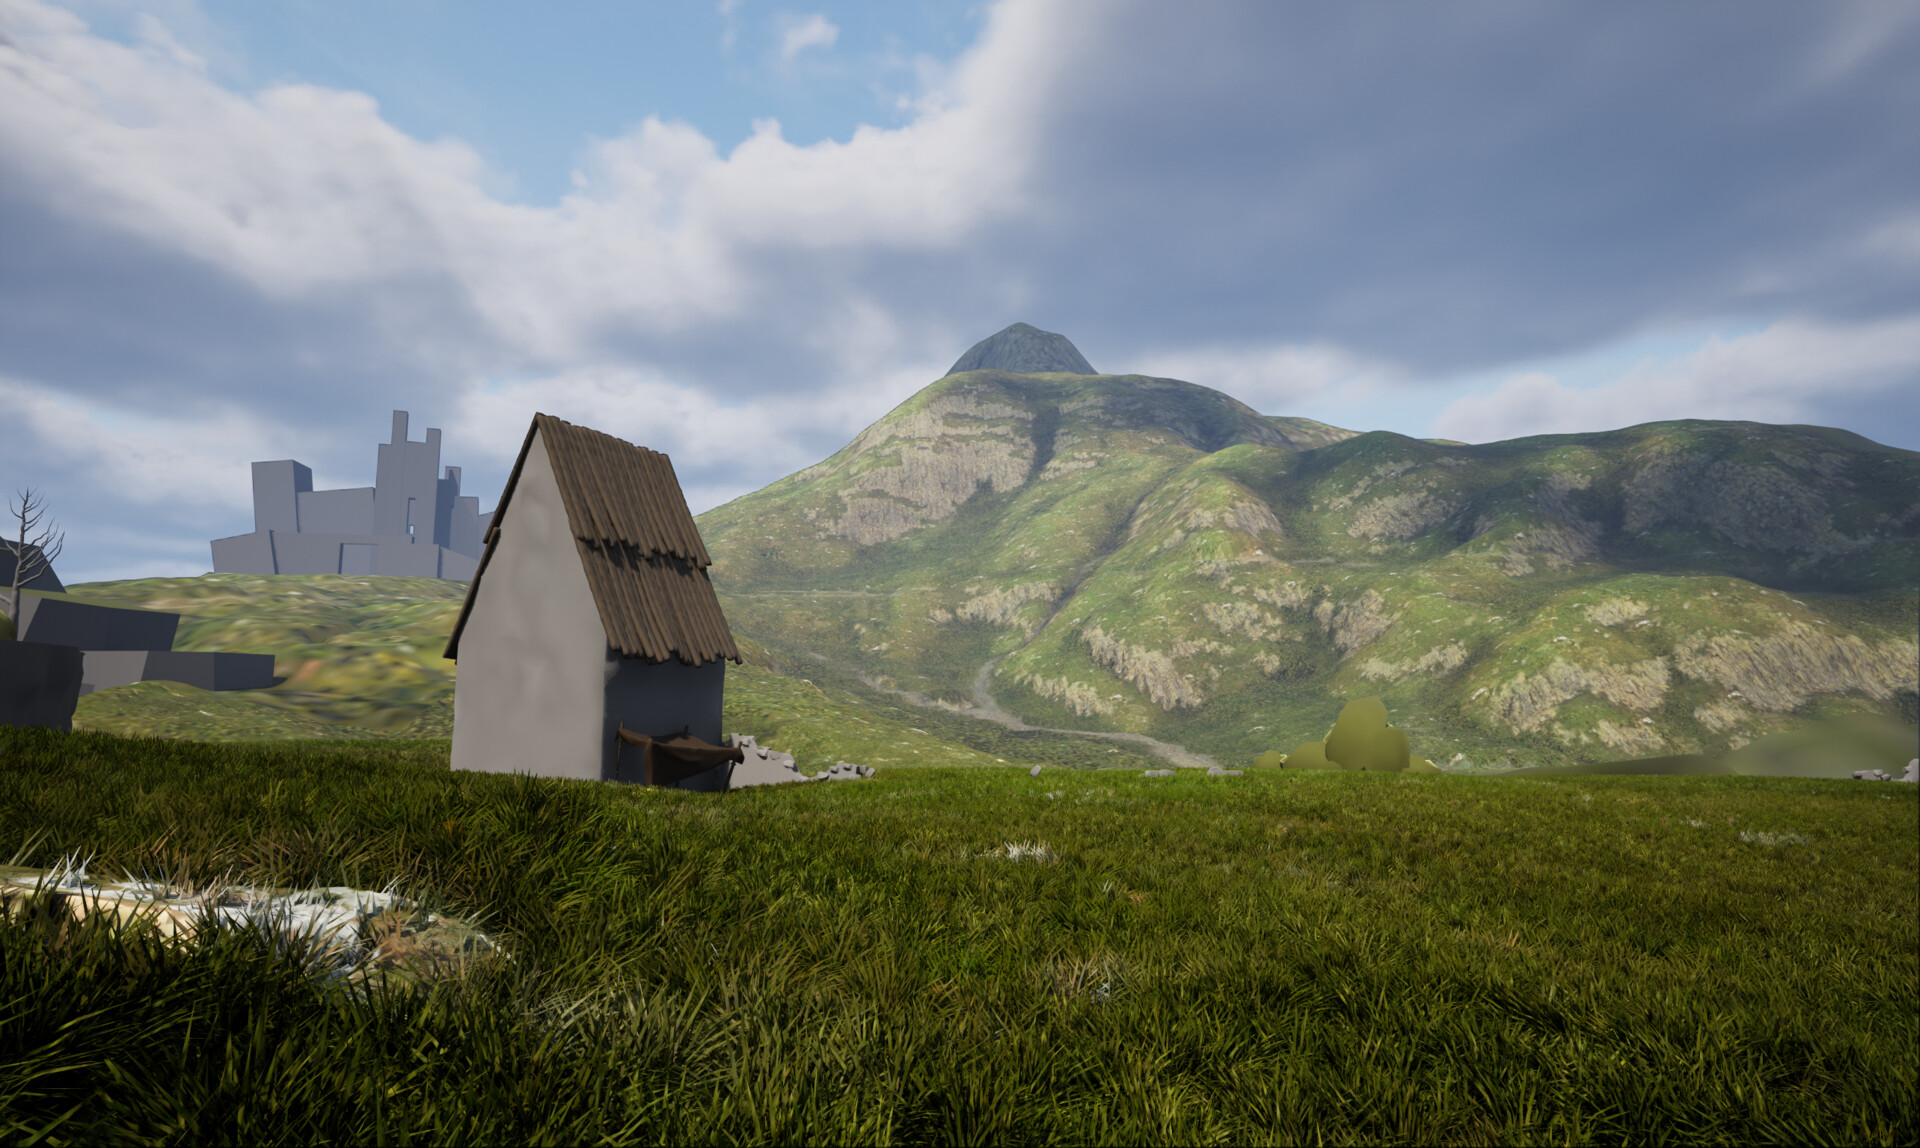
And finally, here is a shot of the still very WIP Pegasus environment starting to come together. Expect big updates soon!


In future blog posts I will talk about:

Roads and Paths

Creating AAA quality grass

And of course, our all new foliage tool: Flora


SideFX Project Pegasus #2 Foliage Foibles

Work In Progress / 04 July 2023

Part 1 Here

I gave up on the Foliage system I was building for Project Pegasus.

It's not my first rodeo with building foliage systems in Houdini. This is my 4th go at the problem.

My first attempt was around 4 years ago. I didn't want to use Speedtree, and naively thought I could do better. The result was a set of tools in Houdini that I think of as "Lystem Power Armour". Essentially I built a parameter interface around the existing Lsystem node in Houdini so that artists wouldn't need to write systems directly. It worked ok, and taught me a lot about Houdini, procedural modelling, and of course trees. 

In my second try round, I focused a lot on how to process scanned data and fuse that with procedural workflows.

My third attempt, which began a year ago, is ongoing. I got hired by Applied Intuition to build a set of in-house tools to replace Speedtree in their pipeline. It is not using Lsystems this time, instead it is a pretty complex simulation of shoot growth and branching that allows for species to be defined by general rules. This project was the culmination of a lot of studying of scientific papers and books on how plants actually grow. It is fair to say that I was heavily inspired by the work and general philosophy of Anastasia Opara. Mimic the process, not the result..

However, each time, I remain unsatisfied. The tool does not produce botanically plausible plants, or it does not produce them quickly enough, or there are too few parameters, or too many. The user-experience is painful, or certain species would be hard to model. Each time, I have gone back to the drawing board, and with Project Pegasus it was no different.


It is right to question whether building custom foliage tooling was even the right move for Pegasus, given that the project has a short duration, small team, and the fact that other foliage tools already exist. In fact Houdini even has its own Labs tree tools as of about a year ago. 

Another of Project Pegasus' artists, Tilman Mielsh, uses Simple Tree Tools, a commercial plugin for Houdini, which seems to a very robust and feature rich analogue to the Speedtree way of working. We spoke about using these tools, and about using the labs tools, but ultimately decided to go with a novel approach, that we would be able to share the development of, and share with the community at the end. 

But, as I said at the beginning, I have given up. In general I hate giving up. I'm more of a stubborn - keep trying different hammers kind of guy, but this time I got totally stuck. I had a frank phone call with Ian Smith, the lead artist, and essentially we made the decision that I should probably move on, maybe to revisit the foliage tooling later. And if it wasn't for Feike Postmes that is probably what would have happened... But more on that later. 

First lets talk a little about the system!


The Foliage system that I designed for Pegasus is intended to bridge the gap between simulation (The Grove) and direct modelling (Speedtree), while stealing some of the best bits of like Lsystems, Space Colonisation and architectural analysis of tree structure.

The core of the idea is that artists work with atomic* tree parts, or prototypes: Stems, Branches and Forks. These are not actual organs, but rather structural modules that when assembled in different configurations can describe the branching structures of any plant. You can think of each prototype as being a simple Lsystem string. These prototypes are represented in the node graph by a seperate node each, and the artist "arranges" their tree by organising these prototypes into a "node tree". clusters of connected prototypes can be thought of as more complex lsystem strings.


In this way, if we stick with the lsystem analogy, artists have a gui that allows them to physically move around and wire nodes which results in the automatic construction of complex lsystems (or branching systems). 

You might be thinking that this sounds an awful lot like the traditional direct modelling paradigm, and you'd be right, it's just stems on stems, but that's because I left out an important detail. The protoypes are not actually geometry, they are, like lsystems, just bundles of logic, or instructions, which all get evaluated (or solved), in a later step. 


There is solver componenet to the systems, which evaluates the tree of nodes (prototypes), above it, and, over a set number of steps, will then grow a tree that is determined by the arrangement of those prototypes. The prototypes contain information about how to twist, how many branches they have, how many steps they should recurse for and also how to respond to external factors like light, gravity and collisions. 


The prototypes and solver are the core of the system, but there are also switch, select, prune and control nodes, each with additional purposes:


Switch: choose between two prototypes based off a condition (e.g. age exceeds certain value)
Select: choose between n prototypes based off of probability
Prune: cause a prototype to "die" after a certain condition is met (e.g. vigor below certain value)
Control: use ramps to direct multiple prototypes changing parameters with respect to certain attributes (e.g. branch angle change with respect to height)

In a way, it is better to  think of this toolkit as an animation state machine for plant growth, rather than simulation or modelling. The prototypes, like lsystems, provide a granular grammar (but visual) to explicitly control a very complex system. Since there is a visual tree of nodes that describes the plant, it should be much more intuitive and open to experimentation.

And that's it, basically!

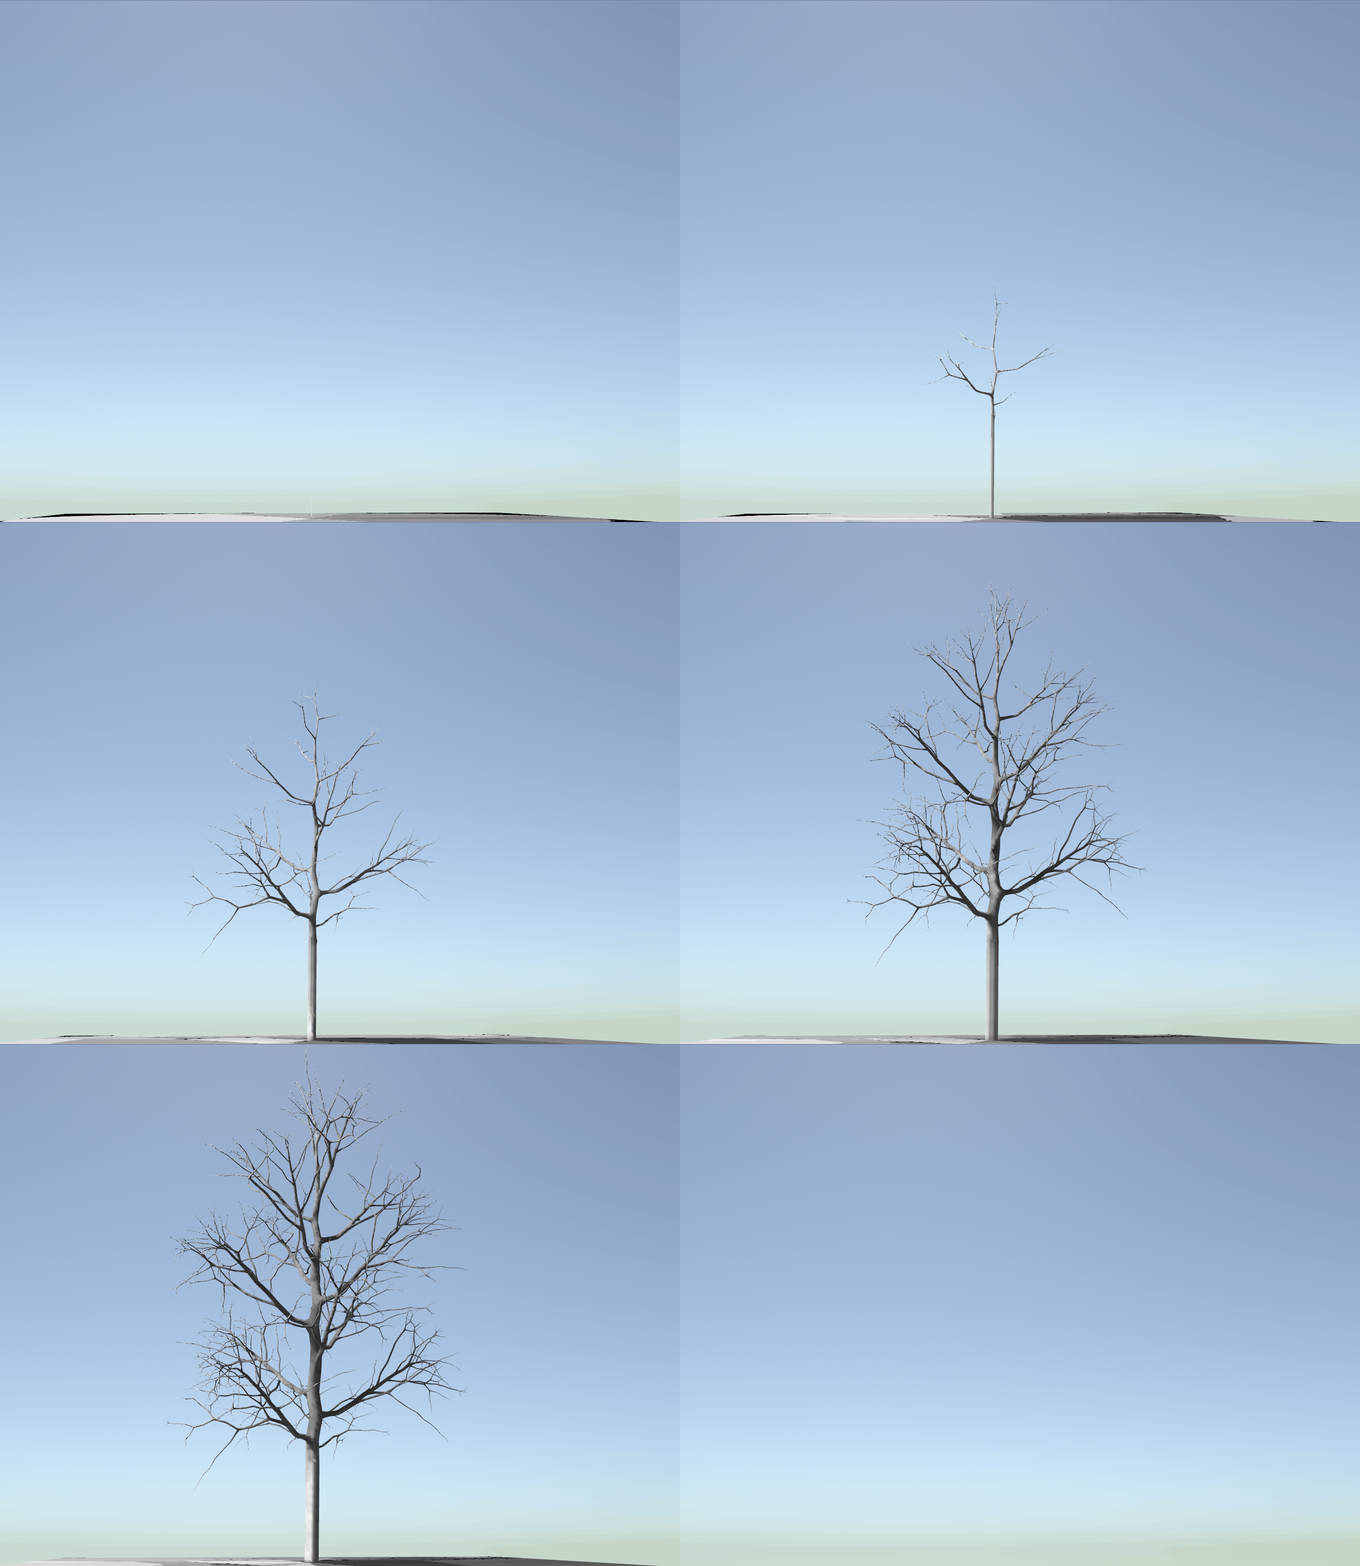
Unfortunately, after some very promising progress for 3 weeks, I got well and truly stuck, and despite several days of hair pulling and jaw-clenching, had to admit defeat. Fortunately, Pegasus is a team project, and doubly fortunately, I happen to have some inspiring team members.  One of whom ( the aforementioned Feike), saw the potential in the system, and wasn't quite ready to let it die. So for now, he's taken over development.

Feike completely rebuilt the logic and code of the system without altering the core design, and progress so far seems to be going very well. If this trend continues, then pretty soon we should some very exciting new tools and foliage workflows to share in the near future. Which, I should emphasize, will very much have a focus on game-development friendly workflows as well as refinements to cumbersome tasks like producing LODS and optimized wind. 

Of course, it wouldn't be fair to make you read all of this without showing the actual system in action, so here are some very early, pre-pre-alpha shots of the system in action, producing a simple tree structure. Eventually, plants produced using the system will look lot more organic and realistic, since they will benefit from artist-defined control ramps to dictate things like the gravitropic response profile, branch angle and competition for light and space, but you'll just have to take my word for that for now :D


For my part, I've switched my focus back to terrain, which was after all my original remit. I'll be sharing more on that in my next blog!

* Stole Tilmans terminology for little bitty bits of plants2

SideFX Project Pegasus blog entry #1

Work In Progress / 16 June 2023

Concept Art by Ian Smith

I've had the exceptionally good fortune to be invited to take part in SideFX Project Pegasus! I'm working alongside talented artists like Ian Smith and Tilman Mielsch on the follow up to last years Project Titan. 

Pegasus will showcase what is possible with game-art workflows in Houdini and Unreal, and we will be releasing everything related to the project for free to the public. This will include tools, tutorials, assets, and of course the final environment itself, which is a fantastical natural environment inspired by the scottish highlands. 

It is still early days, but already some great work has been started by members of the team. For example:


The beginnings of an exciting new modular building tool


A procedural log/beam generator.


Procedural Rocks and Cliffs

During the project we are encountering typical challenges that artists face while building natural outdoor and fantasy environments, and we will be breaking down and documenting how we approached everything! 

One exciting breakthrough we have had, that I think will play a large part in how Houdini is used with Unreal Engine in the future was by another artist on the project, who figured out how to send data from Unreal to Houdini using Unreal 5.2's new PCG system. Previously, if Artists wanted to send terrain or mesh data to Houdini, they needed to send the entire mesh and the entire terrain. Since the introduction of PCG in UE5.2, it is now possible to locally sample the mesh and terrain in Unreal, and send only the sample points to Houdini, this is millions of times faster and allows artists to work much more fluidly with the Houdini Engine plugin for unreal.

For my part - I'm currently working on some foliage related stuff, which I'm excited to share in the near future.